
This guide will walk you through configuring Lobbytrack Intranet.
For help installing Lobbytrack Intranet, refer to:
Install Lobbytrack Intranet
Prerequisites
Lobbytrack Intranet works in-tandem with Lobbytrack Desktop and Jolly Server. Before configuring Lobbytrack Intranet, you must have done the following:
- Installed Jolly Server - does not need to be on the same server but needs to be accessible to Lobbytrack Intranet server.
- Installed Lobbytrack Desktop - does not need to be on the same server.
- Added a visitor group in Lobbytrack Desktop with Host Lookup enabled and configured for Active Directory. Lobbytrack Intranet uses the visitor group's Host Lookup connection to authenticate employees so they can log in to the Lobbytrack Intranet website to schedule and manage their visitors.
- Configured the email server in Lobbytrack Desktop. Lobbytrack Intranet uses the configured email server to send visit confirmation emails (optional).
- The visitor group database must a SQL Server database and it must be accessible to Lobbytrack Intranet server.
Lobbytrack Intranet Configuration
- Open the Lobbytrack Intranet website in your browser at the URL you configured during installation.

- Enter the Administrator email account which will be used to reset the password if necessary, and enter a password.
- The Configuration Summary will be shown.
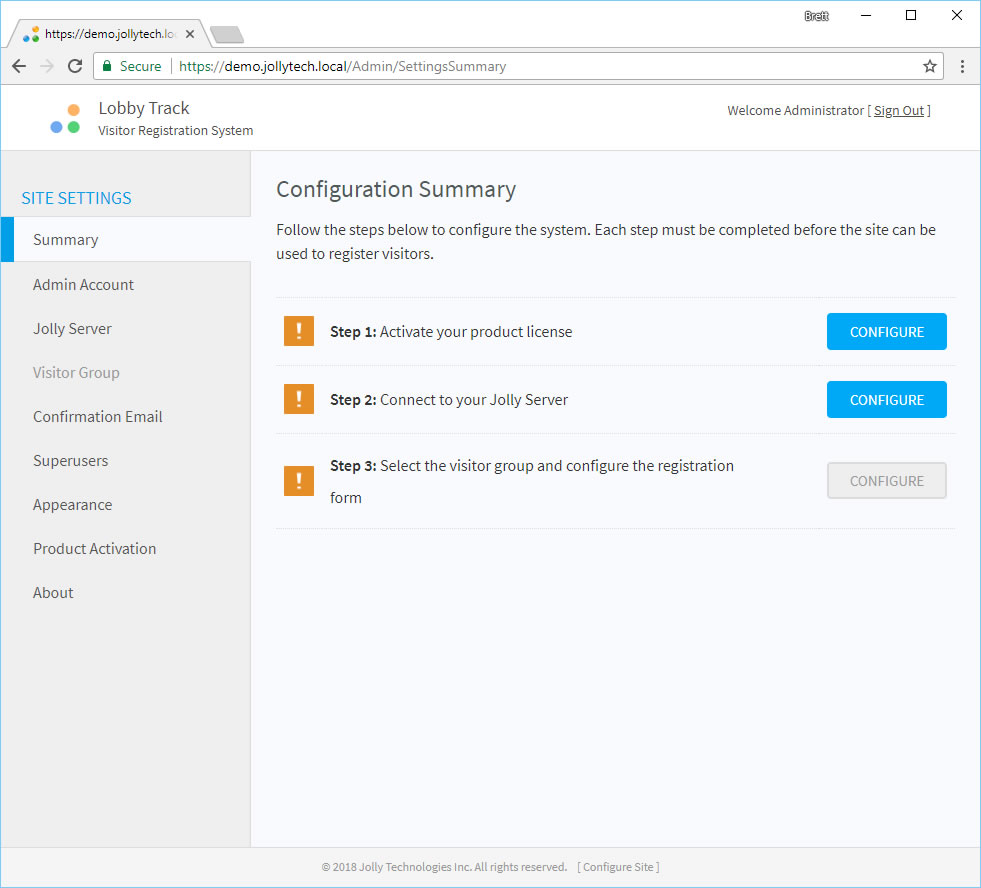
- Click the Configure button next to Step 1 and enter your license information key.
- Go back to the Summary and click the Configure button next to the Step 2 to configure your Jolly Server connection.
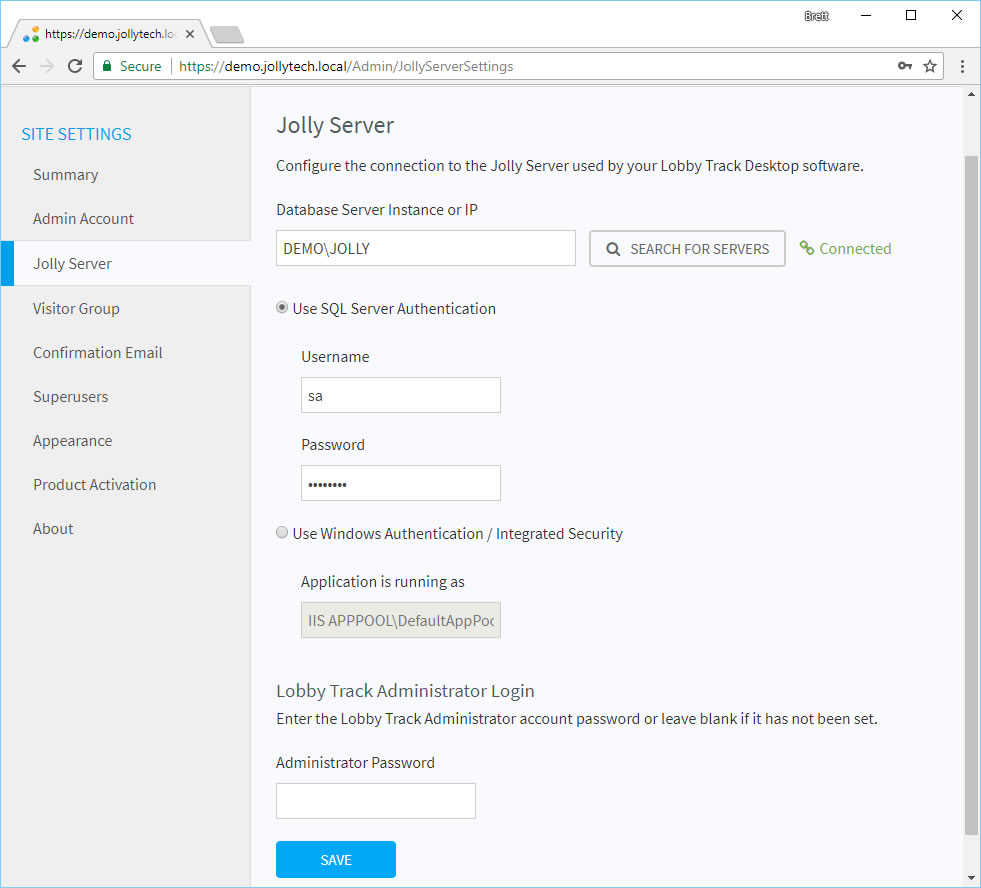
- Click the Search For Servers button to retrieve a list of SQL Server databases and select the appropriate Jolly Server instance or enter the connection string to manually configure the connection (Advanced).
- Enter the SQL Server credentials. If you are using the default Jolly Server and need the "sa" password, please contact us.
- Click Save. If the connection is successful, you will see a "Connected" indicator.
- Return to the Summary and click the Configure button next to Step 3 to configure the visitor group. All of the visitor groups from your Jolly Server are listed. Select the visitor group that you would like to use.
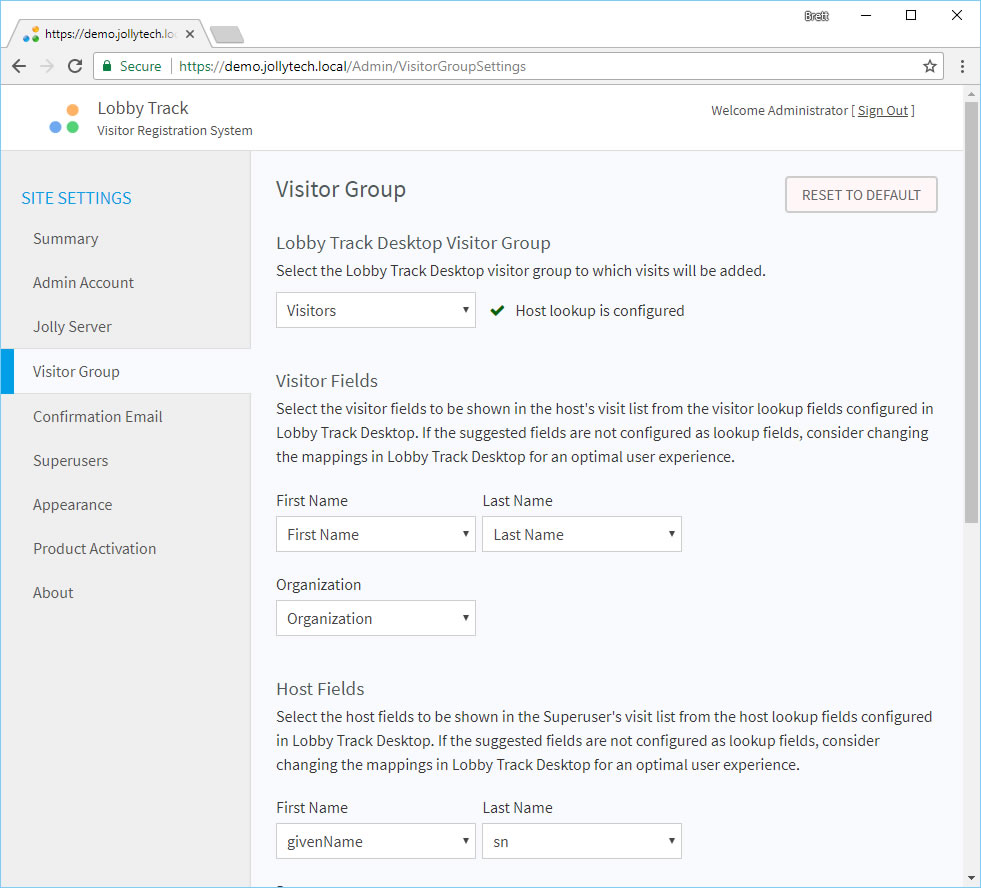
- Follow the instructions on the page. Fields will be auto-mapped where possible. At the bottom of the page, you can configure the visitor registration form. Drag the fields to re-arrange them. You can also toggle visible and whether a field is required. To change a field caption, edit the registration form layout in Lobbytrack Desktop.
- Click on the Confirmation Email tab and optionally enable the sending of confirmation emails to visitors. The outgoing email server settings are retrieved from the Jolly Server as configured in Lobbytrack Desktop and the server name is displayed.
- Click on the Superusers tab and optionally add Active Directory user names in a comma-separated list. Superusers are able to schedule and manage visits on behalf of all users. This can be useful for Office Assistants that schedule visits for other people.
- Click on the Appearance tab to optionally change the website header title and image.
- The site is now configured.
- Click the Sign Out link in the top right corner.
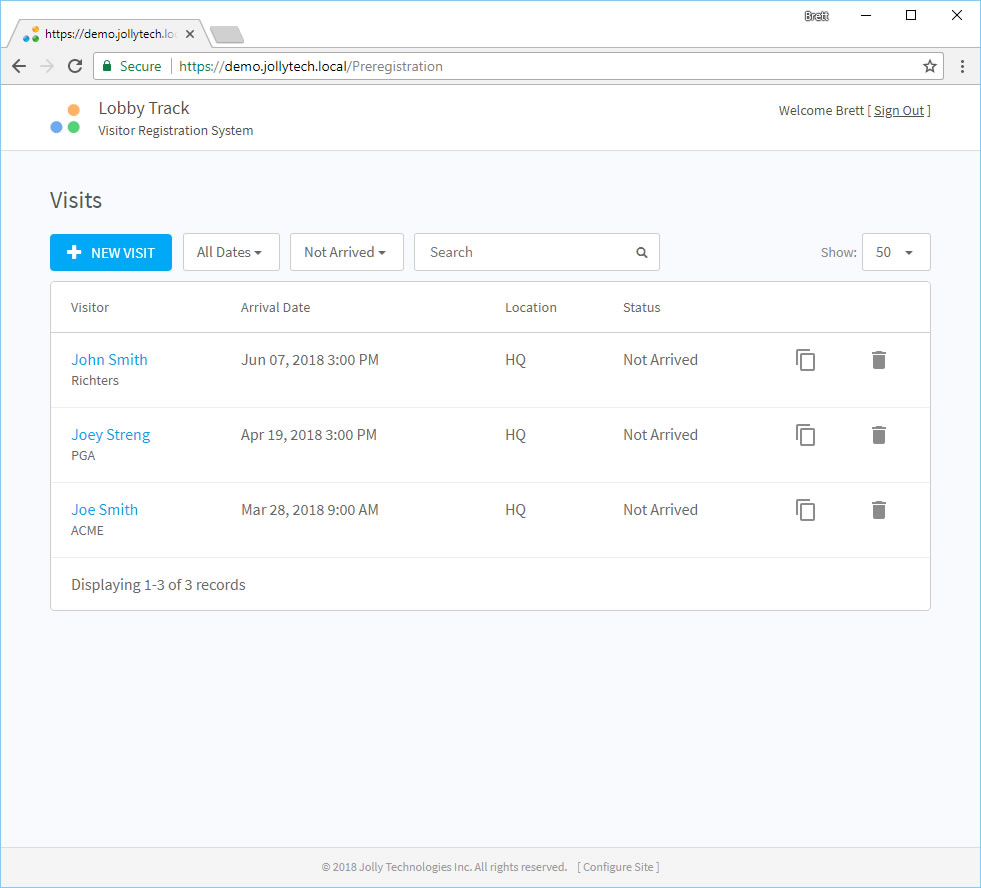
- Click the Go To Main Site button to go the employee pre-registration portion of the site. If you do not see the button and and instead see a message saying that the site is not configured, sign back in using the Administrator password and complete the configuration.
- Enter your Active Directory username and password to sign in.
- The visit list for the user is shown.
- If you need to switch back to the Administrator side of the site, click the "Configure Site" link found at the very bottom of each page.