
The purpose of this guide is to document how to connect Jolly Desktop Software to a Jolly Server.
System Requirements
- - A Jolly software product such as Lobbytrack or ID Flow
- - A Jolly Server installed on your local network
Overview
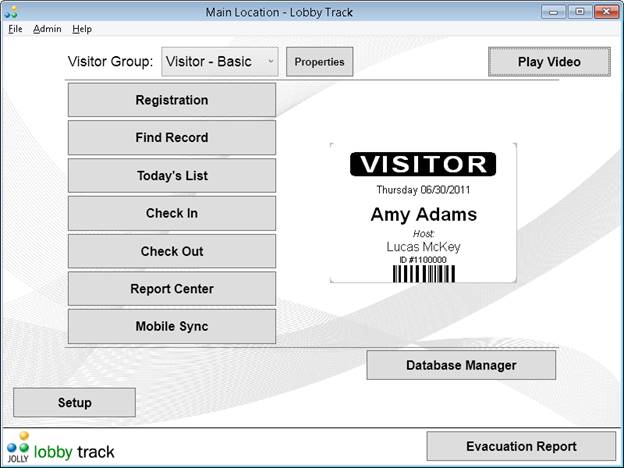
This guide will walk you through the process of connecting your Jolly Desktop Software to a Jolly Server. The steps demonstrated in this guide were written using Lobbytrack but the process is nearly identical for all Jolly Desktop Software.
Important Note - Before You Begin
This guide assumes that you have already installed and configured a Jolly Server on your network.
If you have not, you can download the Jolly Server installer from the link in your order confirmation e-mail or run it off the CD that was included with your software. If you need assistance, please contact support@jollytech.com.
Connect to Jolly Server
- Start the Jolly Desktop Software and navigate to the main menu.
- Select File > Connect to Jolly Server
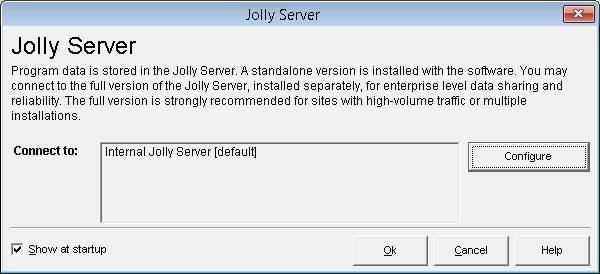
- Click Configure
- Select Connect to Jolly Server. If you installed Jolly Server using the Jolly Server installer, select Standard Jolly Server Connection and click the Server Address box to view the servers detected on your network.
- If your server is available, select it and click Ok to finish. You should now be connected to the Jolly Server and you should skip to the Conclusion.
- If you installed the Jolly Server using the custom installer or the database scripts, continue on to Step 5.
- If your server is available, select it and click Ok to finish. You should now be connected to the Jolly Server and you should skip to the Conclusion.
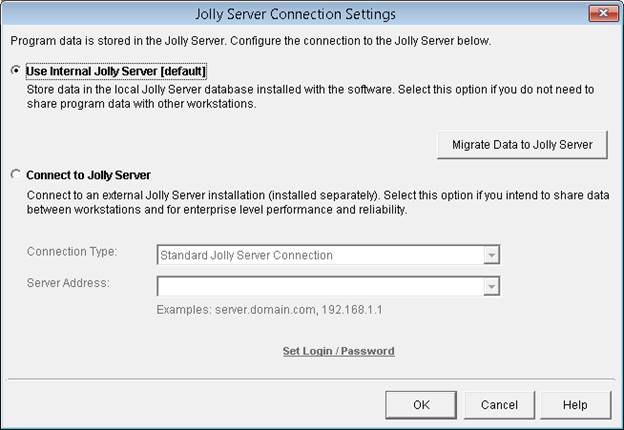
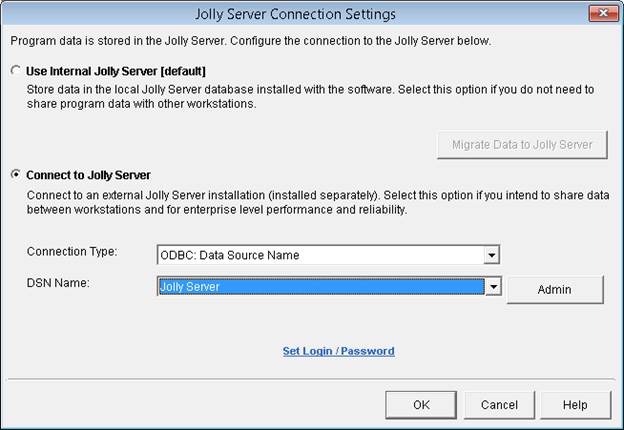
- Set the Connection Type to ODBC: Data Source Name (alternatively you can use one of the other available connection methods such as OLE DB).
- Click the Admin button and select the System DSN tab to create a DSN conenction for all users on this PC. If you select User DSN rather than System DSN, the ODBC connection will only work on this PC for the current Windows user.

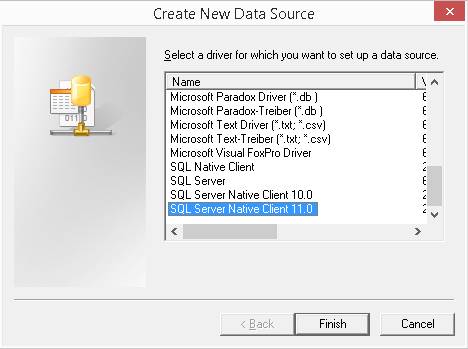
- Click Add... and select the most recent version of SQL Server Native Client.
- Click Finish.
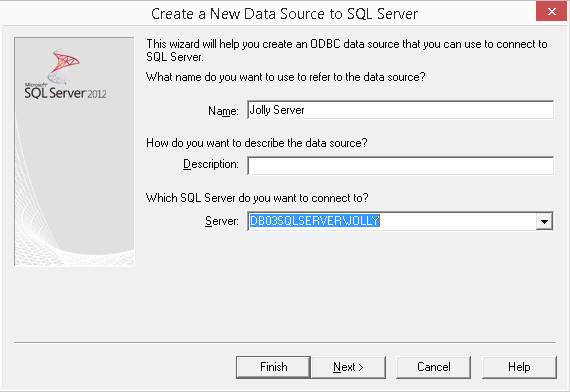
- Configure the adapter by giving it a name and selecting the database server that is hosting the Jolly Server.
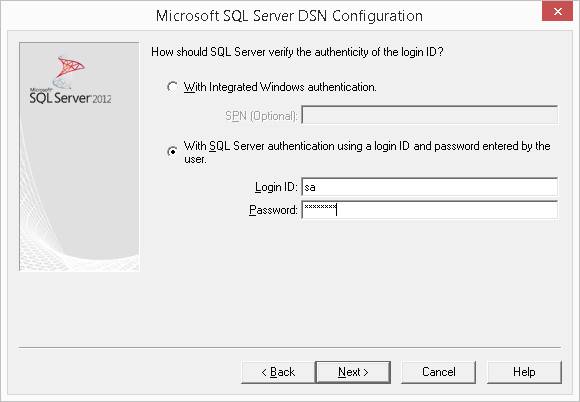
- Click Next and enter the login information.
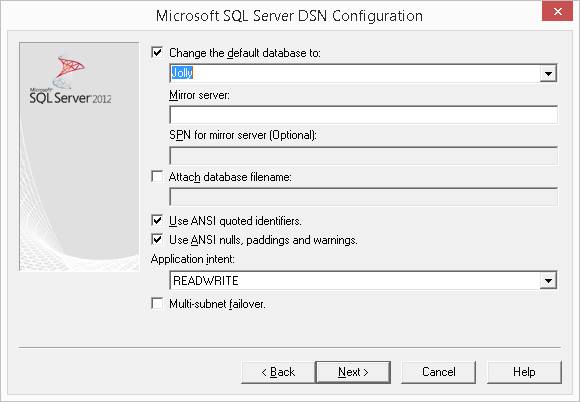
- Click Next and check the Change the default database to: option to Jolly.
- Click Next and then Finish.
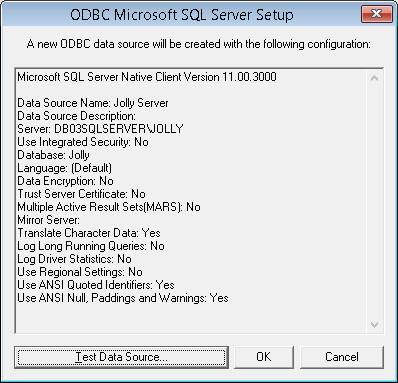
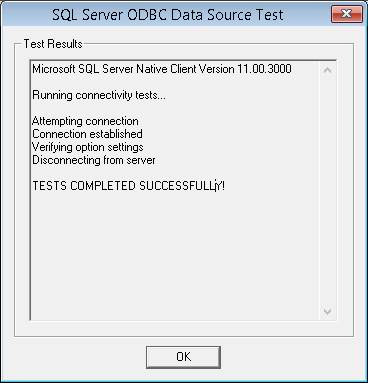
- Click Test Data Source to verify that the connection works properly. If it does not, check your settings or contact your system administrator.
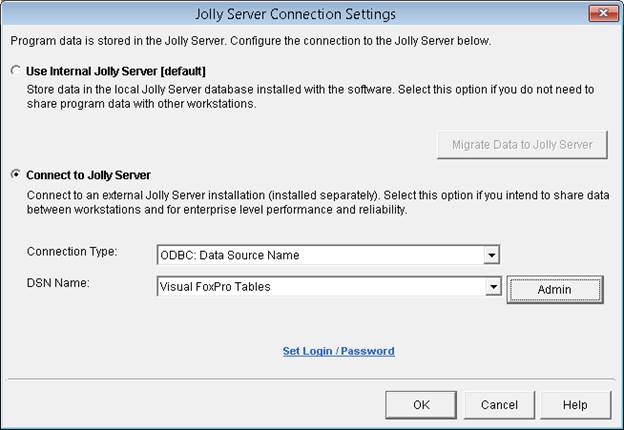
- Click OK to close out the dialogs and then select the new connection from the DSN Name connection box.
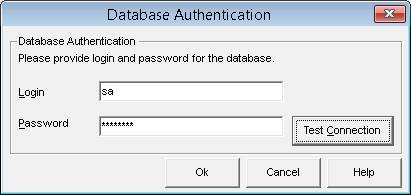
- Click Set Login / Password and re-enter the user login and password.
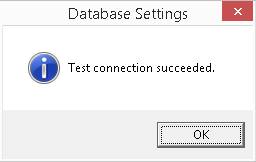
- Click Test Connection to verify that the connection is working.
- Click Ok to close the dialogs.
- Congratulations, you are now connected to Jolly Server!
Conclusion
Once the Jolly Server connection is configured, you will need to configure the software such as adding Visitor or Cardholder Groups, user accounts, etc.